|
SPECIAL
NOTES & RULES - BORG SHIPS ONLY!
* Denotes completely hypothetical
model number and stats, devised by Brad R. Torgersen.
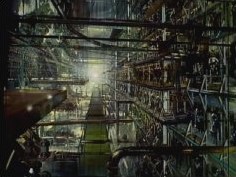 ** SUPERSTRUCTURE POINTS: The Borg superstructure is unique in the STSSTCS in that it is capable of
spontaneous regeneration, essentially rebuilding itself and "healing"
damage in the heat of battle, sort of like the Healing Factor some Marvel Comics
heroes/villains possess. We saw this ability on-screen during the
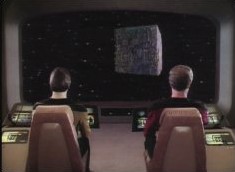
Federation's very first contact with the Borg, when the cube encountered by the Enterprise-D
"heals" a significant amount of phaser damage while simultaneously
pursuing the Enterprise at high warp. I extrapolate that this
regeneration technique requires a certain amount of energy expenditure on the
part of the Borg vessel, so the process is not free for anyone playing the Borg,
but it does provide a significant advantage. The regeneration ratio
indicates how many power points must be expended to regenerate two
superstructure points; nominally, ten energy points yielding two superstructure
points. Granted, players might not normally have a block on their playing
sheets which can be used to allocate power to this process at the start of every
turn. If gamers elect not to improvise such a block when using Borg ships,
then I say let the players decide whether or not to siphon power off of the Borg
weaponry, movement, or shield systems during play, reconverting energy
originally allocated to weapons, movement or shields, back into raw power
points, then expending those power points on regeneration. There is
another important caveat: the Borg ship must have at least 50% of its
original superstructure intact for this process to be viable. If the
superstructure has fallen below 50% of its original capacity, then the Borg ship
is too badly damaged to muster the resources necessary for regeneration.
Regeneration can take place at any time in any turn, during any of the three
phases. ** SUPERSTRUCTURE POINTS: The Borg superstructure is unique in the STSSTCS in that it is capable of
spontaneous regeneration, essentially rebuilding itself and "healing"
damage in the heat of battle, sort of like the Healing Factor some Marvel Comics
heroes/villains possess. We saw this ability on-screen during the
Federation's very first contact with the Borg, when the cube encountered by the Enterprise-D
"heals" a significant amount of phaser damage while simultaneously
pursuing the Enterprise at high warp. I extrapolate that this
regeneration technique requires a certain amount of energy expenditure on the
part of the Borg vessel, so the process is not free for anyone playing the Borg,
but it does provide a significant advantage. The regeneration ratio
indicates how many power points must be expended to regenerate two
superstructure points; nominally, ten energy points yielding two superstructure
points. Granted, players might not normally have a block on their playing
sheets which can be used to allocate power to this process at the start of every
turn. If gamers elect not to improvise such a block when using Borg ships,
then I say let the players decide whether or not to siphon power off of the Borg
weaponry, movement, or shield systems during play, reconverting energy
originally allocated to weapons, movement or shields, back into raw power
points, then expending those power points on regeneration. There is
another important caveat: the Borg ship must have at least 50% of its
original superstructure intact for this process to be viable. If the
superstructure has fallen below 50% of its original capacity, then the Borg ship
is too badly damaged to muster the resources necessary for regeneration.
Regeneration can take place at any time in any turn, during any of the three
phases.
*** ACHILLES HEEL: Superstructure regeneration might, at first, seem like an insurmountable
obstacle for players faced with the Borg, but as we saw in ST: FIRST CONTACT,
the Borg architecture is vulnerable at specific, key points, sort of like the
thermal exhaust port on the Death Star in "Star Wars". The Borg "Achilles
heel" is not obviously observable via shipboard scanners, and as we see on film,
only an opponent with intimate knowledge of the Borg is likely to know of its
existence, much less its placement on any given Borg spacecraft. For game
play purposes the rules surrounding this weakness are deliberately designed to
require that both a Borg player and his/her opponents enjoy a degree of random
luck.
Here is how it works...
1- At the start of every game, the player(s) operating
Borg ships will have to determine the status of the Achilles heel for each of
their individual Borg vessels. This can be done by adding up the total
superstructure points and power units available, and then dividing that sum by
the roll of three six-sided dice. For example, a Borg player commands a
single Large Cube with 1,200 superstructure points and 900 total power units of
output, so he combines the two for a total of 2,100, and then divides that sum
by the sum of three simultaneously-rolled six-sided dice. In our example,
the Borg player rolls a six, a two, and a three, for a total of 11. The
figure 2,100 divided by 11 yields 190.90909090909, which is rounded up to 191.
This number is the total value of the Achilles heel for that individual Borg
ship for the duration of that particular game. All damage against the
Achilles heel in that game will be subtracted from that number, and the amount
cannot be recouped or added to via superstructure regeneration. It is a
static number which can only be subtracted from via battle damage, and once it
has been depleted, the Achilles heel is officially exploited and the Borg player
will then be forced to roll a ten-sided die on the catastrophic Achilles damage
table (seen below!)
 2- Once the Borg player(s) have determined the value(s)
of their Achilles for each Borg ship, they next must determine on which of the
hexagonal shield sides each Achilles heel for each ship lies. This can be
done via a six-sided die. Borg players, be sure to note on your game
sheets the total value of the Achilles for each ship, and on which shield hex, 1
through 6, the Achilles heel sits. It is best if both of these rolls and
their results are made and recorded in private, so that opponents will have no
prior knowledge about the strength and location of the Achilles heel for each
Borg ship. 2- Once the Borg player(s) have determined the value(s)
of their Achilles for each Borg ship, they next must determine on which of the
hexagonal shield sides each Achilles heel for each ship lies. This can be
done via a six-sided die. Borg players, be sure to note on your game
sheets the total value of the Achilles for each ship, and on which shield hex, 1
through 6, the Achilles heel sits. It is best if both of these rolls and
their results are made and recorded in private, so that opponents will have no
prior knowledge about the strength and location of the Achilles heel for each
Borg ship.
3- Once game play ensues, Borg players can proceed
normally until the shielding protecting the hex on which the Achilles heel lies
has been exhausted, leaving the superstructure and other systems open to direct
assault. At this moment, the Borg player must announce that his/her
Achilles heel is exposed, indicating to the other players exactly which shield
hex the Achilles heel is located on.
4- For as long as the shields remain down on the hex
where the Achilles is located, any/all players which successfully fire into that
hex must roll a six-sided die to determine whether or not the damage they
inflict is transferred to the Borg via standard damage table rolls, or directly
to the Achilles heel itself. Every successful hit on the hex which holds the
Achilles will require the attacker to roll on the Achilles hit/miss table (see
below!) to determine what damage, if any, is leveled against the value of the
Achilles heel. Borg players, remember that the Achilles heel cannot
regenerate or be repaired in the same fashion as the superstructure. Also
remember that the shielding on the Achilles hex can be restored at the start of
the next round, assuming the shield generator for that hex has not been
destroyed. Finally, opponents and Borg players both must remember that
only shots fired directly into the same shield hex as the Achilles will have a
chance of damaging the Achilles. Shots that miss due to bad die rolls, or
shots that successfully hit, only on other hex sides, will not affect the
Achilles heel.
5- For example, our Borg player with the Achilles value
of 191 rolls a 3 when determining the hex placement of the Achilles.
During combat he takes multiple strikes on shield side 3 with no affect on the
Achilles so long as the shield protecting it is still up. However, during
the final firing phase of the second turn, shield side 3 is brought down and our
Borg player is forced to announce that his Achilles has been exposed and is
unshielded. Opponents attempt several more shots before the firing phase
is over, several of which miss, a few of which strike sides other than that
assigned to the Achilles, and a few of which hit the crucial, unshielded hex
side 3. Whether or not attackers can even attempt to hit hex side 3
depends purely on their range and their location on the map in reference to the
attitude of the Borg vessel being attacked. Assuming they make successful
hits on the now-unshielded side of the Borg, they then roll on the Achilles
hit/miss table (below) to determine if damage is accorded normally, or goes
straight against the heel. In our example lets assume a phaser strike
worth 11 and a torpedo strike worth 20 both successfully impact on the
unshielded hex side 3 of the Borg player's vessel. The attacker rolls on
the Achilles hit/miss table for the phaser shot, and gets a 6, which means she
has to then roll again on the standard damage table(s) and the Borg player will
record standard damage to his other systems. On the torpedo hit, she rolls
a 2, which means all 20 points of damage go against the Achilles heel, which has
had its value permanently reduced for the duration of the game from 191 to 171;
if that number reaches zero, the Borg player is in deep trouble!
**** BORG SHIELDS: Incorporating the unique Borg shielding into STSSTCS
game play is almost as tricky as incorporating the regenerating superstructure
or the Achilles heel. The Borg shields are able to "learn" from damage
taken, eventually becoming impervious to identical kinds of attacks, even if
delivered by multiple different enemies. In order to defeat this problem,
Alpha Quadrant races have learned to randomly or rotationally vary the
modulation of their weapons, which can then only be blocked if the Borg again
learn the modulation scheme and adjust their shields accordingly. To keep
things relatively simple and avoid any kind of complex shield
modulation/weapons modulation funny business, I took the same approach with the
Borg shields as I did with the Dominion shields, assuming that a certain
percentage of shots will damage the shields while another percentage of shots
will be totally deflected. The rules for Borg shielding are therefore
thus...
When attacking a Borg
craft, the attacking player must make one additional dice roll, assuming his
strike roll yields a hit on a shielded side of the Borg playing piece.
If that side is unshielded, then don't worry about it. Apply damage as
normal, not forgetting to follow the rules surrounding the Achilles heel. But if the side is
shielded, then the attacking player rolls a ten-sided die (or a six, or a four,
or a twenty, it does not matter) to see if the shot had any effect on the Borg
ship's shielding. An even number means the strike does full damage.
An odd number means the strike has been deflected totally, with no loss of
shield strength.
 ^
TRACTOR/SEIZURE BEAM: Like the Shield Neutralizer (below) the
Tractor/Seizure beam is a deceptively benign Borg weapon. Harmless as a
direct offensive device, the Tractor/Seizure beam is nevertheless very dangerous
because ships seized in its grasp cannot take evasive maneuvers to avoid
incoming fire, cannot pivot or rotate to bring shielded sides to bear or move
unshielded sides away from exposure to fire, and cannot go to warp or high
impulse in order to escape the battlefield altogether. In STSSTCS gaming
terms this means that a vessel successfully seized/tractored loses all movement
points for the duration of the turn during which it is successfully seized.
Once captured, the seized ship can be manipulated at the expense of the Borg
vessel, using whatever energy points have been used to energize the
tractor/seizure beam in any given turn. Thus, if a Borg ship makes a
successful hit on a Type B Vor'cha with a
tractor/seizure beam, the Vor'cha loses all movement points for that turn and
will remain in the Borg's grasp until the Borg player either releases the
Vor'cha, or the Vor'cha batters down the Borg shields and makes a called shot,
destroying the weapons bank projecting the tractor/seizure beam which has caught
it. Baring that, the Vor'cha is at the Borg's mercy, movement-wise.
Expending a maximum of 50 energy points, the Borg can maneuver the Vor'cha in
our example at exactly the same rate as the Vor'cha could move itself.
Meaning, to draw the Vor'cha four hexes closer to itself so that it can get a
better shot, the Borg attacker needs to expend 7 points per hex, the same as the
Vor'cha's movement point ratio, using power previously allocated to the
tractor/seizure beam prior to the start of the turn, for a total of 24 points. ^
TRACTOR/SEIZURE BEAM: Like the Shield Neutralizer (below) the
Tractor/Seizure beam is a deceptively benign Borg weapon. Harmless as a
direct offensive device, the Tractor/Seizure beam is nevertheless very dangerous
because ships seized in its grasp cannot take evasive maneuvers to avoid
incoming fire, cannot pivot or rotate to bring shielded sides to bear or move
unshielded sides away from exposure to fire, and cannot go to warp or high
impulse in order to escape the battlefield altogether. In STSSTCS gaming
terms this means that a vessel successfully seized/tractored loses all movement
points for the duration of the turn during which it is successfully seized.
Once captured, the seized ship can be manipulated at the expense of the Borg
vessel, using whatever energy points have been used to energize the
tractor/seizure beam in any given turn. Thus, if a Borg ship makes a
successful hit on a Type B Vor'cha with a
tractor/seizure beam, the Vor'cha loses all movement points for that turn and
will remain in the Borg's grasp until the Borg player either releases the
Vor'cha, or the Vor'cha batters down the Borg shields and makes a called shot,
destroying the weapons bank projecting the tractor/seizure beam which has caught
it. Baring that, the Vor'cha is at the Borg's mercy, movement-wise.
Expending a maximum of 50 energy points, the Borg can maneuver the Vor'cha in
our example at exactly the same rate as the Vor'cha could move itself.
Meaning, to draw the Vor'cha four hexes closer to itself so that it can get a
better shot, the Borg attacker needs to expend 7 points per hex, the same as the
Vor'cha's movement point ratio, using power previously allocated to the
tractor/seizure beam prior to the start of the turn, for a total of 24 points.
There are some important caveats. First, the
tractor/seizure process doesn't work against shields. In order to grasp a
vessel, the Borg must knock down the shields on at least one side of the craft
in question, otherwise the shields form a slippery energy bubble which the
tractor/seizure beam cannot hold. This also means that if a previously
seized/tractored ship is able to raise all six of its shields to full power at
the start of the next turn, the Borg's grasp is broken and the shields of the
target vessel must again be dropped and the ship again successfully hit with yet
another tractor/seizure beam. Second, the bare minimum energy requirement
of each tractor/seizure hardpoint is 20. Anything less, and the
tractor/seizure beam becomes useless. Third, the tractor/seizure beam has
limited range, and all attacks using it must still make rolls to hit on the
standard table using the correct firing chart. Fourth, once a ship is
seized it remains in the hex where it was originally hit until it is free
from the beam, destroyed, or otherwise manipulated by the Borg attacker.
Thus, a Borg cannot latch onto a host of ships and then take off running, all
its tractored prey remaining in motionless lockstep along with it the whole
time. Those craft will remain in the hexes where they were first seized,
until released, or able to raise shields, or until the Borg ship goes beyond the
firing chart range of the tractor/seizure beam itself. Fifth, the
tractor/seizure beam is independent of firing or movement phases, meaning Borg
energy points expended on tractoring a ship need not be distributed over
movement phases, and a Borg ship can manipulate a captured vessel while in a
firing phase.
So, getting back to the Vor'cha. The Borg
attacker first uses several Shield Neutralizer (see below) strikes to knock down
the Vor'cha's three forward shields. With the Vor'cha still blazing away
at the Borg's own shielding, the Borg ship uses a 50-point tractor/seizure beam
to grasp the Vor'cha and hold it motionless seven hexes away. Next
movement phase, the Borg ship moves two hexes aft, but the Vor'cha stays in the
hex where it was capture, still firing, yet unable to move. During its own
firing phase, the Borg ship burns 21 points from its tractor/seizure device to
drag the Vor'cha three hexes closer, where the Borg ship then unloads with
Cutter and Destroyer beams. Recognizing his plight, the Klingon player
manages to raise all six shields to full power at the start of the next
turn, this freeing his Vor'cha from the Borg, and now the Borg has to re-knock
down the Vor'cha's shields and try to tractor/seize it all over again. Et
cetera, et cetera.
 ^^ SHIELD NEUTRALIZER: As
shown in the TNG episode where the Borg are first encountered, the Borg don't
use Dominion-like poloron weaponry which can cut immediately through Alpha
Quadrant shields. Instead, Borg ships are shown firing a pellet-like
energy burst which, given a successful strike, can simultaneously disable Alpha
Quadrant shields entirely and drop a ship out of warp. The Shield
Neutralizers are therefore quite unlike the rest of the Borg arsenal, in that
they affect shielding only and have no damage modifiers, nor do they
damage superstructure or other systems once a shield has been dropped.
They are armed somewhat like torpedoes or Romulan plasma weaponry, but affect
shielding alone, and then, potentially in one fell swoop. It matters not
if an Alpha/Beta quadrant foe has a particular shield hex energized to 40 points
or more. A single Shield Neutralizer bolt, worth barely 10 energy points,
has a 50/50 chance of knocking that 40-point shield down to zero, assuming a
successful die roll on the part of the Borg player attacking an Alpha/Beta
quadrant foe. As with the Borg shields, a ten-sided die is rolled, this
time by the Borg player. Odd -numbered results mean the Borg's opponent's
shielding remains intact, albeit drained by the requisite 10 points originally
expended on the Shield Neutralizer for that turn. Even-numbered results
mean that the entire shield, on whichever hex side happens to get hit, is
dropped, regardless of how highly it has been energized. For example, if a
Borg ship targets hex side 4 on a Mk. I
Sovereign-class
starship with its shields fully raised, the Borg ship is facing a total shield
strength of 35 on that hex. Assuming the Borg make a successful roll to
hit, the Borg player then rolls a ten-sided die to determine if only 10 points
are taken off that shield (reducing it to 25) or if the shield is entirely taken
down for the duration of the turn. Odds, the former. Evens, the
latter. ^^ SHIELD NEUTRALIZER: As
shown in the TNG episode where the Borg are first encountered, the Borg don't
use Dominion-like poloron weaponry which can cut immediately through Alpha
Quadrant shields. Instead, Borg ships are shown firing a pellet-like
energy burst which, given a successful strike, can simultaneously disable Alpha
Quadrant shields entirely and drop a ship out of warp. The Shield
Neutralizers are therefore quite unlike the rest of the Borg arsenal, in that
they affect shielding only and have no damage modifiers, nor do they
damage superstructure or other systems once a shield has been dropped.
They are armed somewhat like torpedoes or Romulan plasma weaponry, but affect
shielding alone, and then, potentially in one fell swoop. It matters not
if an Alpha/Beta quadrant foe has a particular shield hex energized to 40 points
or more. A single Shield Neutralizer bolt, worth barely 10 energy points,
has a 50/50 chance of knocking that 40-point shield down to zero, assuming a
successful die roll on the part of the Borg player attacking an Alpha/Beta
quadrant foe. As with the Borg shields, a ten-sided die is rolled, this
time by the Borg player. Odd -numbered results mean the Borg's opponent's
shielding remains intact, albeit drained by the requisite 10 points originally
expended on the Shield Neutralizer for that turn. Even-numbered results
mean that the entire shield, on whichever hex side happens to get hit, is
dropped, regardless of how highly it has been energized. For example, if a
Borg ship targets hex side 4 on a Mk. I
Sovereign-class
starship with its shields fully raised, the Borg ship is facing a total shield
strength of 35 on that hex. Assuming the Borg make a successful roll to
hit, the Borg player then rolls a ten-sided die to determine if only 10 points
are taken off that shield (reducing it to 25) or if the shield is entirely taken
down for the duration of the turn. Odds, the former. Evens, the
latter.
|


 BRAD'S
COMMENTS - A BORG REVIEW: Personally,
I find the Borg to be the most disturbing among all of the Federation's
adversaries in Trek history. As John DeLancie quipped to Patrick Stewart
during the ST:TNG episode in which the Borg first appeared, such formerly
impressive threats as the Romulans and Klingons are miniscule compared to the
omnivorous Borg, whose legacy supposedly stretches back over "thousands of
generations" and whose domain encompasses thousands of star systems.
Perhaps if the Borg were merely tyrannical, as with the shape-shifting Founders
and their Dominion, they would not bother me so much. But the Borg don't
just rob you of your freedom, the Borg rob you of your soul, leaching
your thoughts and personality of their useful components while simultaneously
turning your body into an anonymous waldo for the Collective ³ber-mind that
controls the Borg from everywhere, all at once. In this regard the Borg
are far and away more dangerous than the Dominion, or any other Star Trek foe
yet seen, and the magnitude of their crimes against the galaxy are so far above
and beyond anything within the capabilities of the other Star Trek bad guys as
to render the Borg in a class all by themselves. They are the Milky Way's
bona fide Super Power, with the Federation and other nations under constant
threat of assimilation into the Collective so long as even a single Borg is left
alive, capable of replicating itself and assimilating others.
BRAD'S
COMMENTS - A BORG REVIEW: Personally,
I find the Borg to be the most disturbing among all of the Federation's
adversaries in Trek history. As John DeLancie quipped to Patrick Stewart
during the ST:TNG episode in which the Borg first appeared, such formerly
impressive threats as the Romulans and Klingons are miniscule compared to the
omnivorous Borg, whose legacy supposedly stretches back over "thousands of
generations" and whose domain encompasses thousands of star systems.
Perhaps if the Borg were merely tyrannical, as with the shape-shifting Founders
and their Dominion, they would not bother me so much. But the Borg don't
just rob you of your freedom, the Borg rob you of your soul, leaching
your thoughts and personality of their useful components while simultaneously
turning your body into an anonymous waldo for the Collective ³ber-mind that
controls the Borg from everywhere, all at once. In this regard the Borg
are far and away more dangerous than the Dominion, or any other Star Trek foe
yet seen, and the magnitude of their crimes against the galaxy are so far above
and beyond anything within the capabilities of the other Star Trek bad guys as
to render the Borg in a class all by themselves. They are the Milky Way's
bona fide Super Power, with the Federation and other nations under constant
threat of assimilation into the Collective so long as even a single Borg is left
alive, capable of replicating itself and assimilating others. When you consider the obscenity and depth of this perversion, and the extent to
which the Borg have taken it--literally thousands of intelligent species have
been absorbed into the Collective over its millennia-long lifespan--the Borg clearly stand
alone as, in the paraphrased words of one Starfleet officer, the closest thing
to pure evil the Federation has ever faced.
When you consider the obscenity and depth of this perversion, and the extent to
which the Borg have taken it--literally thousands of intelligent species have
been absorbed into the Collective over its millennia-long lifespan--the Borg clearly stand
alone as, in the paraphrased words of one Starfleet officer, the closest thing
to pure evil the Federation has ever faced. Given the fact that
the Borg possess countless thousands of super-powerful vessels, like the
ubiquitous cube, it seems rather un-Borg-like to send only a single cube,
vulnerable to a concentrated defensive strike, rather than a sizeable fleet of several
tens or even a few hundred cubes. If the Federation is so attractive to
the Borg that the Borg would go out of their way to assimilate the Federation
long before the Borg's perpetual border expansion naturally overlaps the
Federation frontier, doesn't it make sense that the Borg would load the odds in
their favor? Especially after the first cube is destroyed, and it becomes
apparent that the Federation is capable of defeating the Borg; at least on a
single-cube basis? What about the ST:VOY episode "Hope and
Fear", wherein one of the final survivors of a technologically advanced
species that has been assimilated tells us that his home system was eventually
surrounded by "hundreds of cubes" before the end came? And this
was a race apparently quite adept at keeping the Borg at bay, at least until the
crew of the USS Voyager inadvertently helped the Borg overcome that
race's resistance to the Borg. So it stands to reason that even a small fleet of cubes could have easily
overwhelmed the Federation and Earth defenses on either of the two occasions
when the Borg struck into the Alpha Quadrant, and it is never explained to the audience why the
Borg would suddenly alter tactics that have worked successfully for thousands of
years, against thousands of different enemies.
Given the fact that
the Borg possess countless thousands of super-powerful vessels, like the
ubiquitous cube, it seems rather un-Borg-like to send only a single cube,
vulnerable to a concentrated defensive strike, rather than a sizeable fleet of several
tens or even a few hundred cubes. If the Federation is so attractive to
the Borg that the Borg would go out of their way to assimilate the Federation
long before the Borg's perpetual border expansion naturally overlaps the
Federation frontier, doesn't it make sense that the Borg would load the odds in
their favor? Especially after the first cube is destroyed, and it becomes
apparent that the Federation is capable of defeating the Borg; at least on a
single-cube basis? What about the ST:VOY episode "Hope and
Fear", wherein one of the final survivors of a technologically advanced
species that has been assimilated tells us that his home system was eventually
surrounded by "hundreds of cubes" before the end came? And this
was a race apparently quite adept at keeping the Borg at bay, at least until the
crew of the USS Voyager inadvertently helped the Borg overcome that
race's resistance to the Borg. So it stands to reason that even a small fleet of cubes could have easily
overwhelmed the Federation and Earth defenses on either of the two occasions
when the Borg struck into the Alpha Quadrant, and it is never explained to the audience why the
Borg would suddenly alter tactics that have worked successfully for thousands of
years, against thousands of different enemies. During the pitched battle for Enterprise-E, the Borg tactics are quite
aggressive, almost predatory, not plodding and oblivious as seen
previously. Assimilation itself has become near-instant, as the Borg have
adopted the use of prehensile injector tubes to deliver a burst of
self-replicating nano-robots into the bloodstream of "prey" species,
whereupon the nano-robots begin assimilation of the individual on a cell-by-cell
basis. Loss of individual thought and personality is almost as quick, with
the injected subjects falling under the sway of the Collective within moments of
being exposed to the nano-robots. Even the skin of the injected subject
undergoes a near-instant transformation, with the Borg "mottling"
effect rapidly tracing the attack path of the nano-robots as they seek out and
assimilate the subject from within.
During the pitched battle for Enterprise-E, the Borg tactics are quite
aggressive, almost predatory, not plodding and oblivious as seen
previously. Assimilation itself has become near-instant, as the Borg have
adopted the use of prehensile injector tubes to deliver a burst of
self-replicating nano-robots into the bloodstream of "prey" species,
whereupon the nano-robots begin assimilation of the individual on a cell-by-cell
basis. Loss of individual thought and personality is almost as quick, with
the injected subjects falling under the sway of the Collective within moments of
being exposed to the nano-robots. Even the skin of the injected subject
undergoes a near-instant transformation, with the Borg "mottling"
effect rapidly tracing the attack path of the nano-robots as they seek out and
assimilate the subject from within. There is also the matter of the Borg "queen",
who puts a face on the otherwise faceless Borg, and provides us with a window on
the mentality that was, perhaps, ultimately responsible for creating the Borg in
the first place. At first glance the queen seems like another writing
gaffe, as it is made explicit that the Borg do not operate in traditional
dominance hierarchies as do most other nations, and that no one individual
person or species controls the Borg, as is the case with the Dominion. But
upon reflection I've come to believe that the queen was a very necessary
addition to the Borg, primarily because if the Borg Hive Mind was merely the sum
of its assimilated parts, then the collective revulsion and self-hate that must
surely fester within all the assimilated species would surely cause the Borg to
fragment to the point of self-destruction. Emotionally and intellectually,
there has to be some kind of overarching force that drives the
Collective, keeps the individuals slaved to the communal whole, and remains
insanely obsessed with the assimilation of (presumably) all humanoid life in the
universe, en route to the achievement of the Borg's cryptic idea of
"perfection".
There is also the matter of the Borg "queen",
who puts a face on the otherwise faceless Borg, and provides us with a window on
the mentality that was, perhaps, ultimately responsible for creating the Borg in
the first place. At first glance the queen seems like another writing
gaffe, as it is made explicit that the Borg do not operate in traditional
dominance hierarchies as do most other nations, and that no one individual
person or species controls the Borg, as is the case with the Dominion. But
upon reflection I've come to believe that the queen was a very necessary
addition to the Borg, primarily because if the Borg Hive Mind was merely the sum
of its assimilated parts, then the collective revulsion and self-hate that must
surely fester within all the assimilated species would surely cause the Borg to
fragment to the point of self-destruction. Emotionally and intellectually,
there has to be some kind of overarching force that drives the
Collective, keeps the individuals slaved to the communal whole, and remains
insanely obsessed with the assimilation of (presumably) all humanoid life in the
universe, en route to the achievement of the Borg's cryptic idea of
"perfection".